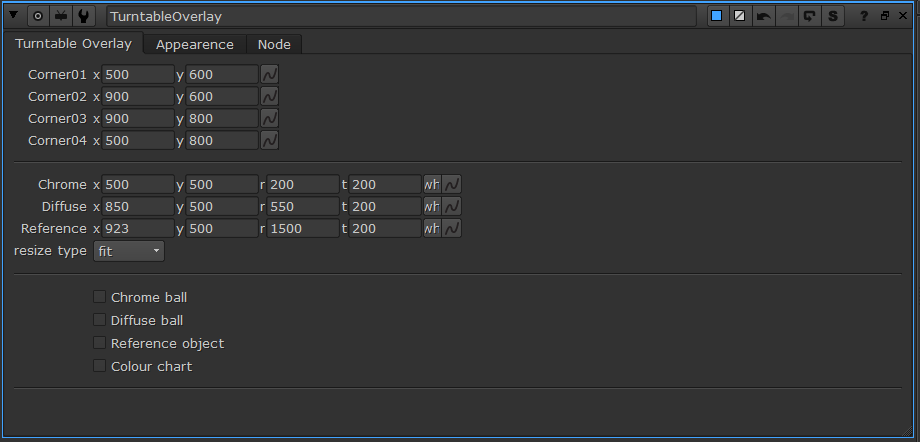
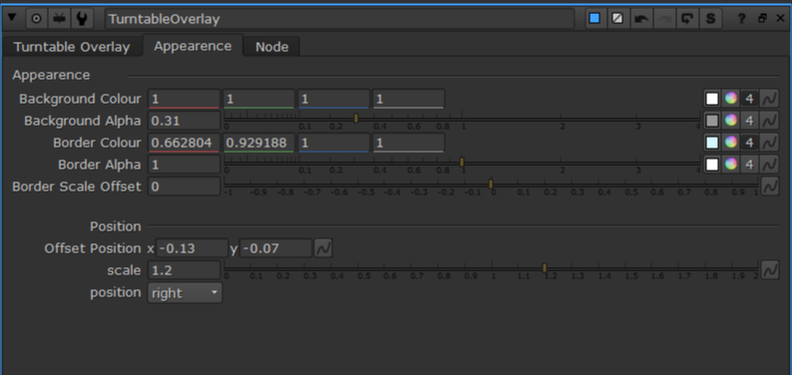
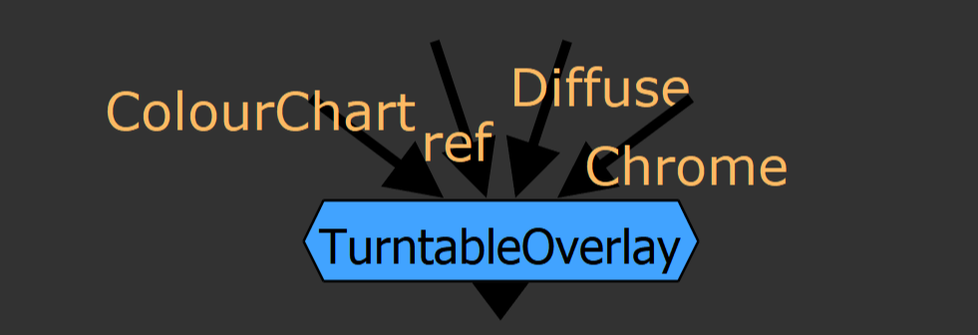
 a long while ago... A long while ago, the CG supervisor at our studio asked for a hand in making a Nuke tool that would help him and his team better display the on-set references to the rendered references along with the CG render. He wanted a tool that could display the on-set chrome ball, matte ball, MacBeth chart, and reference objects in an adjustable way to fit any rendered shot. To meet these challenges, I created the TurntableOverlay node for Nuke. how do I use TurntableOverlay? To set up the overlay, begin by plugging in the pipes in the TurntableOverlay node to their respective images. Plug the Chrome and Diffuse pipe into an image that contains the chrome ball and diffuse ball, respectively. Plug the ColourChart into the MacBeth chart or similar colour reference guide. Finally, plug the ref pipe into any reference image. The pipes can be plugged into the same input, different input, or no input. Use the checkboxes at the bottom of the TurntableOverlay tab to select which inputs will be displayed in the overlay. The crop boxes for each input mark the rectangular section of the image will be displayed in the overlay. Use the appearance tab to adjust the background and border colours of the overlay, as well as the transparency. The offset position and scale knobs will move the overlay around the viewport while the position knob has a few predetermined positions to snap the overlay to.
how does it work?The guts of the group works by taking each piped in input and reformats the input image to the dimensions that the user specifies with the crop boxes. The reformatted image is merged with the background tile and border before being placed on a card. There are two sets of cards for each input, one for a vertical display, such as when the position knob is set to right or left, and the horizontal layout for when displayed horizontally. The cards are transformed and scaled uniformly to move anywhere in the viewport before exiting the group. This project is an ongoing learning process for myself and I’m sure there are many adjustments to be made to improve this tool. Feel free to reach out with any ideas on how to sharpen this concept and work out the kinks. I hope you find this tool useful in some capacity. Happy Programming! installation
Add this code to your menu.py which lives in the .nuke directory

0 Comments
|
|||||||